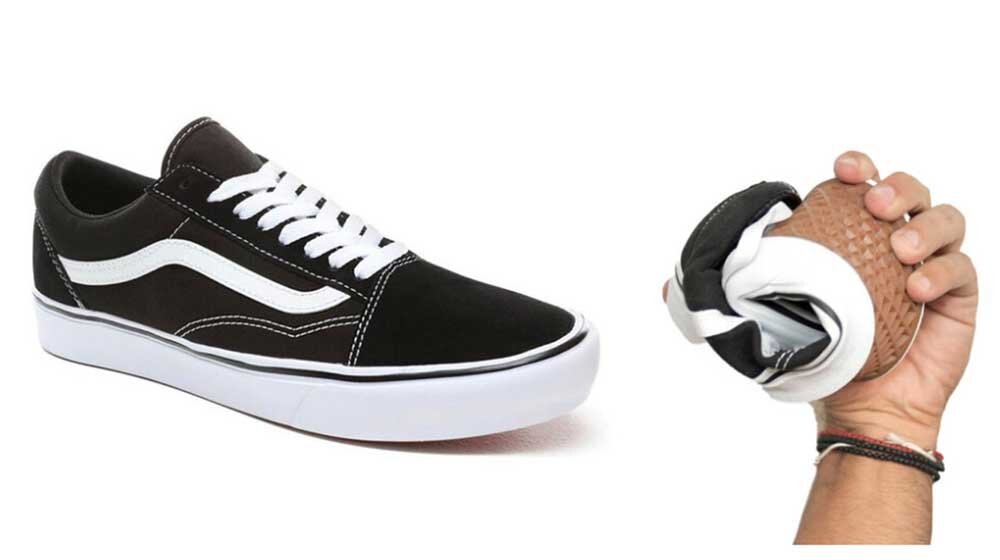
How to Turn Vans into Barefoot Shoes
Written by Christopher Ioannou, BSc (Hons) Sports & Exercise Science
Reading Time: 10 minutes
Table of contents
The video version of this post:
Today I'm going to show you how to turn a pair of ordinary Vans into flexible and highly responsive barefoot shoes with lots of ground feel.
The Benefits of Barefoot Shoes
Figure 1 - Barefoot Shoes Have a Minimally Thick Sole
For those of you who are unaware of this, barefoot shoes are supposed to have flat, minimally thick soles to provide the feet with excellent ground feel and flexibility in movement. This enables us to receive optimal sensation from the surface we are walking on, which in turn stimulates all the muscles in the feet, legs and even hips. And this, in turn, makes it possible to maintain a beautifully strong arch and consequent stability in the lower body, which is essential for athletic performance and injury prevention.
The Problem with Traditional Footwear
In light of this these facts, ever wondered why modern-day shoes all tend to have arch support?
Figure 2 - Traditional Shoe Layers
They kind of have to, because their thick and cushioned soles blunt the foot's senses and thus fail to stimulate the supporting muscles to hold a strong arch.
The trouble is that all you end up with are even weaker feet and flatter arches as a result.
It's like trying to fix a problem by making another problem.
But, hey, from a monetary perspective, this approach works well because you can now market the “special” arch support as a stand-out feature and even sell them as accessories.
Figure 3 - Inner Soles are Marketed as 'must have' Accessories
Why Barefoot Shoes Have Not Been Massively Adopted
The barefoot shoe industry are no angels either. Many of the brands in this space are exploiting the fact that they are in a niche market by charging pretty exorbitant prices for sometimes pretty averagely made footwear.
And it’s not just me who is saying this. We have received loads of comments from you guys complaining about the current price of barefoot shoes.
Figure 4 - Are Barefoot Shoes Expensive? Your Comments….
Another reason for which wearing barefoot footwear hasn’t been massively adopted is that they are not widely available yet. For example, there is an extremely limited range of barefoot shoes available in South Africa, which is where I'm originally from.
But let me just backtrack a bit to explain how Vans fit into this story.
Vans are a Great Value for Money Pair of Shoes
So, I wore Vans for a few years because they were both stylish and affordable. They are what we’d call great value for money. I'd buy one or two pairs every year and wear them pretty much every day. During this period, while still living in South-Africa, I got into researching barefoot shoes. And after searching for a decently-priced and fashionable pair to replace my Vans, I was completely out of options.
So, I took matters into my own hands and decided to turn my much-loved Vans into barefoot shoes.
I came up with the idea out of necessity due to the state of the barefoot shoe market at the time. My hope is that those who find themselves in a similar predicament will find the following “hack” very useful.
Okay, so let's get this project started then.
Why Vans can work as Barefoot Shoes
Vans are well suited for this purpose, for the following reasons:
Zero Drop Soles
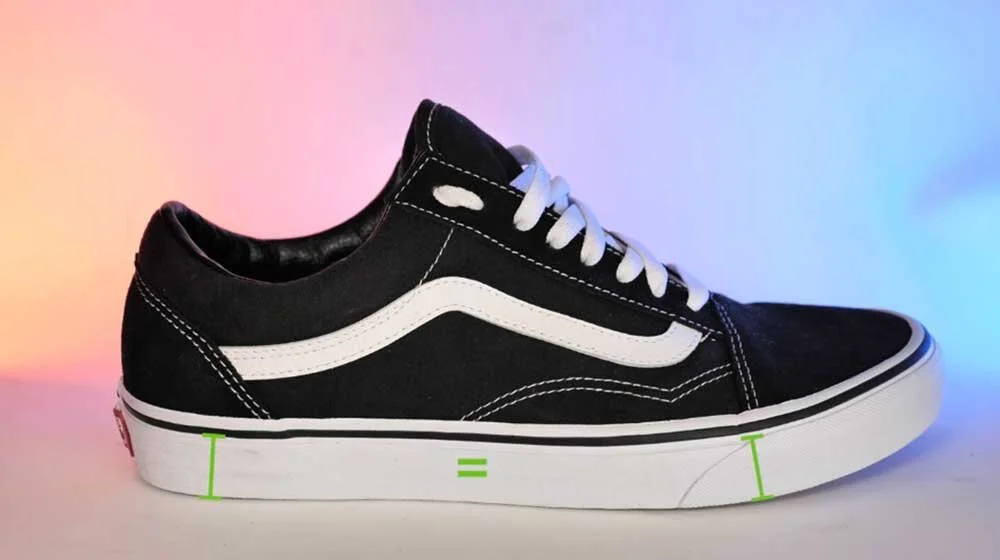
Vans Have Zero Drop Soles
Vans have flat, zero-drop outer soles, which means that the heel portion of the outer sole is not thicker than the mid-foot section, as commonly seen in most footwear these days.
Thin Soles
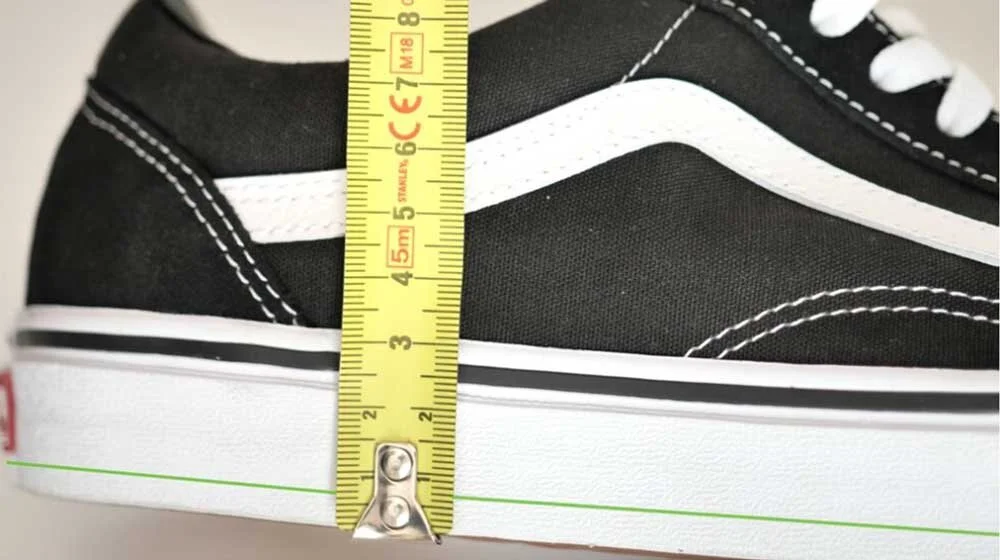
Vans Have Thin Soles
The weight-bearing portion of the Van's outer soles are also pretty thin. We estimate them to be about 7mm thick. Don't be fooled by the lip around the edges. That has no influence on the under sole, which is the part we stand on.
Removable Inner Sole
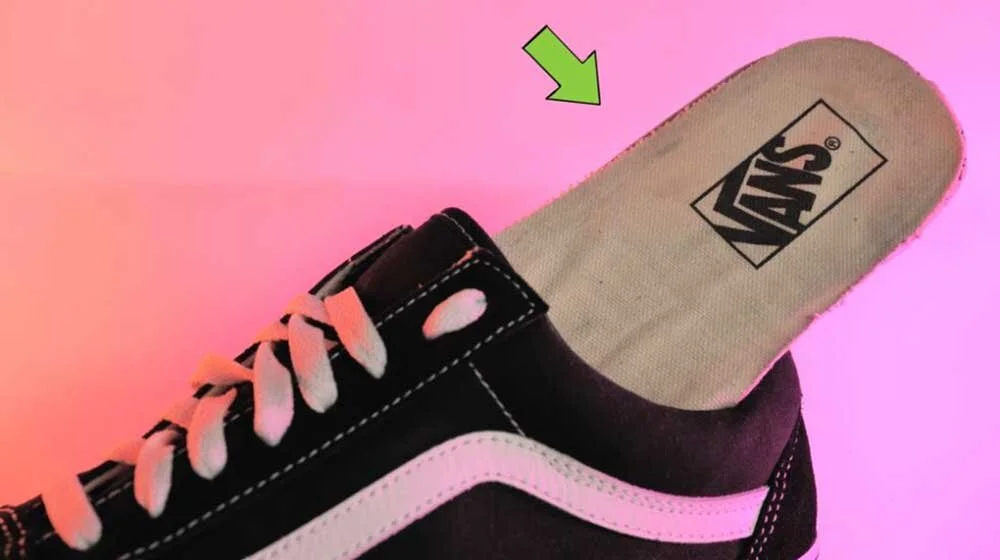
Vans Have Removable Inner Soles
Most of the cushioning one feels underneath the foot in these shoes is actually the inner sole layers.
So, it is this inner sole that we are going to change today.
The Build
You Will Need: Scissors, Shoe Glue and Thin Inner Soles
All right, there are two Vans models that work well as barefoot shoes – The Old Skool and The Original. Some of the other Vans models won’t work, so just bear that in mind.
Removing the Inner Soles
You'll need to start the reconstruction by pulling out the inner sole, which is glued to the outer sole. I found that the easiest place to get a grip on all the layers of the inner sole was around the arch portion of the shoe.
Figure 5 - The Best Grip Area for Inner Sole Removal is around the Arch Portion of the Shoe
Once you have a good grip, you'll need to start tugging on the inner to work the glue loose. This is a slow and tedious process. It took me almost 5 full minutes to get each one out.
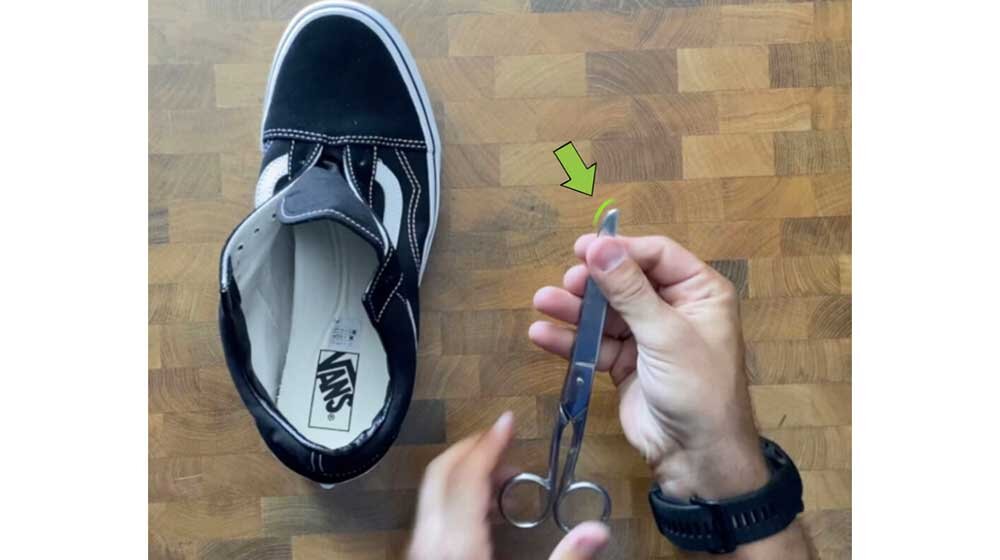
At some points I used the blunt end of a pair of scissors as a wedge between the inner and outer soles to break the really tough bits of glue. However, be careful not to puncture the outer sole with your scissors.
Figure 6 - Use the Blunt End of the Scissors to Help Remove the Tough Bits of Glue
Patience and perseverance is key in this step.
Once you have finally removed the inner sole, tear out any other bits of material that are left behind.
Figure 7 - Inner Sole Layers and Thickness of Vans
As you can see, the inner sole is made up of multiple layers and is pretty thick. It even has a slightly raised heel, which is definitely not what we want in barefoot-style shoes.
With this thick chunk of material out, there will be less than a centimetre separating your foot from the ground.
Figure 8 - Bare Rubber and Stitching of the Vans without Inner Sole
Now the only issue is that the joins and stitching of the uppers to the soles of the shoes are exposed, which would bother the wearer, even while wearing socks. Furthermore, I found that having direct contact with the rubber made my feet sweat a lot more than usual.
Replacing the Inner Soles
So, to solve these issues, I purchased ultra-thin and flexible fabric inner soles. I avoided ones made from silicone and those that had arch support. The ones I chose were literally just thin pieces of fabric that absorb sweat and provide a nice, even surface to stand on.
Figure 9 - New Inner Sole
Amazon links to similar inner soles can be found below:
To get the right fitting inner, I purchased the one you can cut to size. I then peeled the cotton cloth off the old sole, because it served as both a perfect stencil and finishing touch to this project.
Figure 10 - Steps to Replacing the Inner Soles of Vans
However, before tracing the outline of the cotton cloth on the new inners, I smeared a thin layer of shoe glue onto the cotton cloth and pasted it onto the new inner soles.
I then put a book on it and left it to dry. Two hours later, the soles were ready to be cut to size, following the outline of the cotton cloth from the old sole.
Figure 11 - Placing New Inners into Vans Shoes
After that, it was just a matter of slipping the inner soles into the shoes and smoothing them.
Vans as Barefoot Shoes
Figure 12 - Vans as Barefoot Shoes
And there you have it – Vans with a significantly thinner sole thickness that mimics those found in many barefoot shoes.
And when you look at them – inside or out – you can't even tell that they’ve been modified.
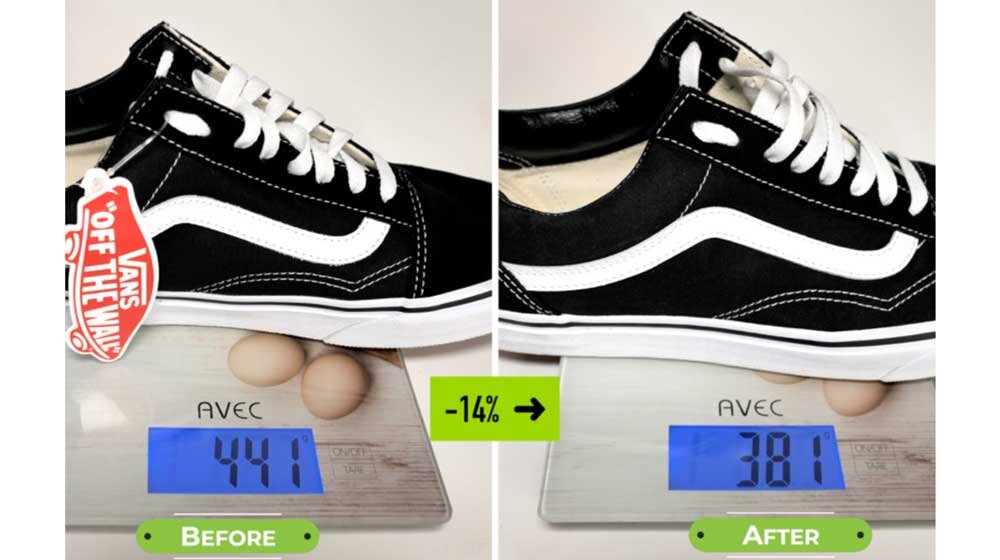
Figure 13 - Weight Difference Between Original and Modified Version of Vans
However, If we compare the weight of the shoe before and then after the modification, we see a pretty significant reduction in weight by around 14%, which is a testament to how much material was in the old inner sole.
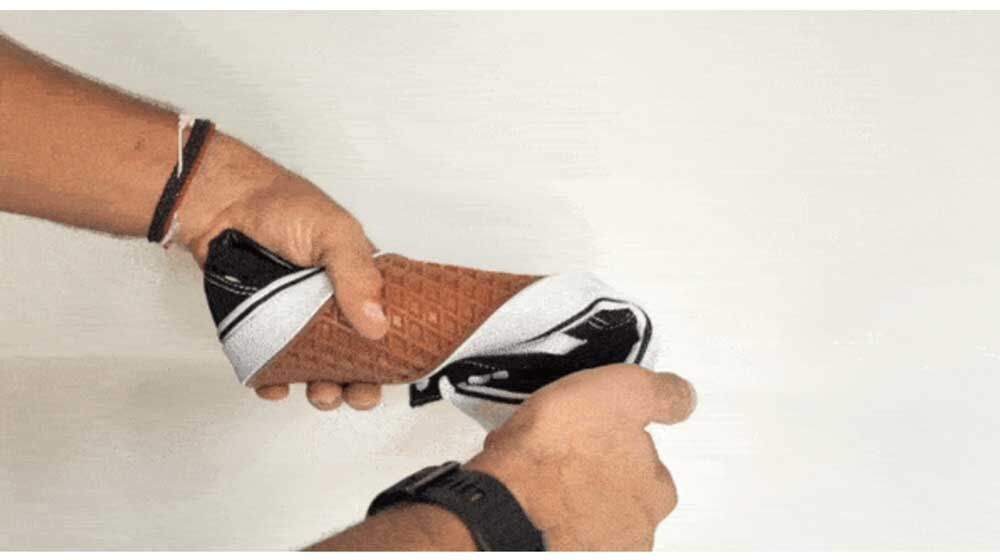
Figure 14 - Twisting the Modified Vans Old Skool
And since all that excess mass has been removed, the shoes are also much more flexible now, which is another important quality in barefoot shoes.
Furthermore, I’ve found the outer sole to soften with use which further improves the flexibility of these shoes.
Why Vans Are Not Good for Wide Feet and Toe Spread
Now, despite the great upgrades, I do have one important disclaimer to make in this video, though.
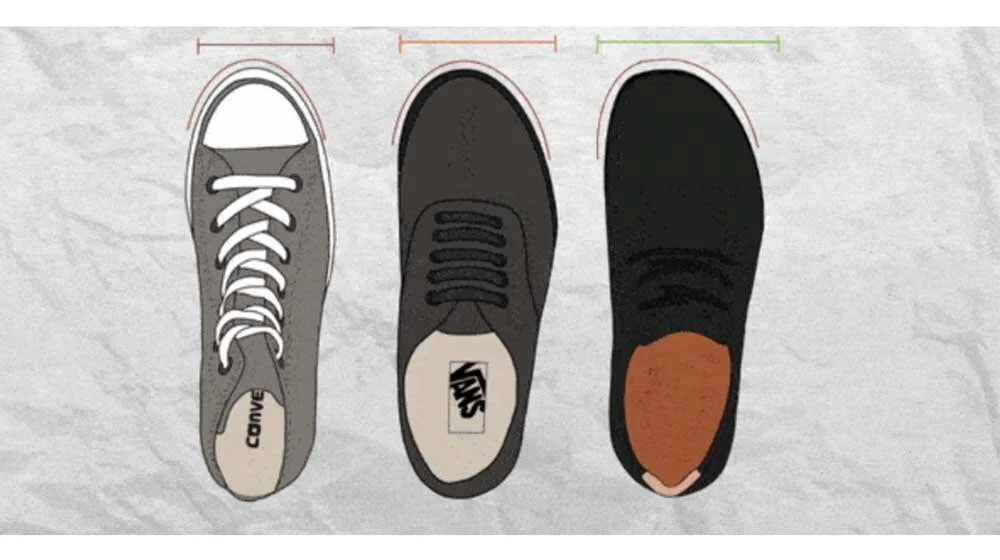
Vans can never be true barefoot shoes because their toe box is not wide enough to accommodate the natural way our toes flatten and spread while walking and running.
Figure 15 - Narrow Toe Box of Vans Shoes
You can see how narrow they are when I place an exact outline of my foot over the toe box.
It is for this reason that I eventually stopped wearing Vans, despite making the upgrade to the inner soles.
Figure 16 - Vans vs All Stars vs barefoot Shoes
This is also why we never chose All-Stars for this project – because they are even narrower in the forefoot area.
Vans as Barefoot Transition Shoes
If you are one of the many people out there who are interested in barefoot shoes, but just can't justify paying the premium price, then Vans, with our recommended adjustments, might be a good compromise for you.
There are also many of you who are still on the fence about whether or not barefoot shoes are the way to go. Well, this might be a good experiment... sort of a transition shoe that is both affordable and familiar.
How to Transition to Barefoot Shoes Without Getting Injured
Figure 17 - Transition to Barefoot Shoes
Talking about transition, when one first takes this thick piece of cushioning out of one’s shoes, the hard ground becomes highly noticeable. As a result, the muscles and connective tissues in the legs and feet start working harder than they have ever worked in the past.
While this is a good thing – it is the reason for which barefoot shoes are so beneficial – there is one caveat that must be mentioned, namely the risk of developing injuries, specifically what is known as “overuse injuries”.
The truth is that the body needs an adequate amount of preparation and time to condition itself to moving without supportive footwear. Because we have relied on our shoes for support most of our lives, we now need to start training the internal structures to start doing all the work.
Figure 18 - Plantar Fasciitis
Unfortunately, it is the high injury rate that is the main argument against barefoot shoes. We even see it in the academic literature.
However, upon further investigation, it became clear that the risk was not in the barefoot movement itself, but in the lack of preparation for it [1] [2].
So, to reduce this risk, we have carefully put together a scientifically-based Barefoot Shoe Transition Program to take you through all the necessary steps needed to safely prepare and strengthen your feet and the surrounding musculature when changing over to minimal footwear.
Learn more about this programme here.
Final Thoughts
Okay, so, in conclusion, even though Vans are not the ultimate barefoot shoe, we hope that this little DIY hack can inspire many people to experiment with their Vans to find out what it feels like to wear shoes with excellent ground feel.
I’m extremely confident – and I speak from experience here – that once you have spent enough time feeling the exciting terrain around you, you'll never go back to normal shoes again. It would be like putting a pair of thick gloves over your hands, only to lose the sense of touch and feeling that stimulates and excites our brains each and every day.
On that note, thanks for reading. If you enjoyed this post, subscribe to our YouTube channel or join our newsletter for more Health Science Made Simple.
Until next time. Cheers.


